Tuesday, February 19, 2019

Butterfly Plants Including Monarchs!

If you are interested in my live butterfly Flowers, Contact me on Facebook Messenger  for more information. Currently, I sell only in Kansas but I may be opening up to more Midwest S
tates this year.  It's still in the Planning stage.  

Monday, September 4, 2017

How to Clone New Fruit Trees - and other plants


After much searching, I found a wild fruit tree that the Plains Indians of America used for fruit.  The SandHill Cherry Bush.  I was looking for the Sandhill Plum I couldn't find a Nursery that had it in stock.  Finally, I did find a relative.  The SandHill Cherry Bush.  I also learned that there is a SandHill Apricot, SandHill Peach and even a SandHill Pecan tree!  My father had a shelterbelt on the farm made up of SandHill Plums.  I loved it.  Someday I hope to find this bush again.  From them, many Kansan Pioneers made Plum Jellies and Jams and other delicious desserts.  And I will clone them too!  Today I will show you how to clone your own fruit tree - or many other plants if you wish.  And so we Begin:
After I bought my little Sand Hill bush, I started to make cuttings.

My Brand New Sand Hill Cherry Bush
 To make a "Cutting"  You need a healthy semij-soft healthy stem from newer but sturdy growth.  I cut several that were about 6 inches long.


Cut just below a fat leaf bud   and place in a
   pint jar of water to keep from drying out while
           you cut more stems.  You will retrim and clean later.
After you have several healthy looking Cuttings, you can then take your jar of Cuttings inside and trim the stem at a proper angle and strip all the leaves but a few two or three at the very top.  You will need these so the stem can gather a little light to continue to grow food for the stem cuttings.

                                           
                                          Here I am using a sharp Box Knife and cutting just below a
                                               a leaf bud at the bottom of the cutting. Try to cut at a sharp angle
                                                60 degrees to expose a wide slice of stem.  This allows water to
                                               get into the stem easier.  You might want to dip the knife blade
                                                     into Alcohol (rubbing alcohol is fine) to steralize the blade as you go
.

Next you will want to clean off extra leaves.  This is to reduce stress on the stem .  It will not have to feed these leaves.


Using your thumb and fingernail, just nip off the leaves close
to the stem but just before the leaf bud.  This is the area where
new roots will form.  Nip all but a couple of leaves at the top.


Dampen the bottom of the stem with water.  Shake the stem a bit to get rid of extra water and dip into a rooting hormone.  Easily found at any Plant Nursery.
Here are shown to equally good Rooting Hormones.

Dampen the stem near the cutting end

Dip the damp end (with a bud) into the powder and shake the
excess powder off.  You are then ready to place it into the
Sprouting Chamber that I will show you how to make next.

               How to Build Your Own Sprouting Chamber

If you can, find one of the Smaller coffee cans and one Large coffee can.  Metal is good.

Smaller Coffee Can

Drill a few holes in the bottom about 3/8's inch.

Coat it inside and out with a good outdoor paint like Rustoliam.

I like to use separate colors for each can but it
doesn't matter what colors you us.  This keeps
the cans from rusting.
Small Can Finished

Likewise, spray the inside and Outside of the Large Can.
              Place a canning lid ring in in the Center. or any lid for that matter.
                Actually, any lid will do.  You just need a pedestal to keep the Small
              Can off the bottom of the Large Can -  to allow excess water to be
 held in the large can.  This will hold the
          small can off the bottom of the large can so it can easily drain.

 Add Course Sand to the small Can.  A piece of window screen
 should be added to the bottom to the bottom of the cann to avoid
loosing sand out the bottom.

Course Building Sand is best. It drains well and allows Air to
 get to the new roots that we hope will form.  This can often be
 found in Tube Sand to add weight to the back of your car or
                truck if you live in a cold area in winter.  I find mine at Ace Hardware.
         I Don;t recommend Childrens Sand.  It slows down drainage
and seals of air to the new roots when they hopefully form. 


Place the small can with the sand into the large can centered over
the lid you have at the bottom of the large can.  pour enough water
dampen the sand well.  Drain the large can if you have over a small
    amount accumulate in the large can. The leavel of water should never
    reach the smaller can with sand in it.  The new plant cuttings should
always  be damp but never sit in water to prevent rotting.

An Ordinary #2 pencil will come in handy next.

Poke a hole in the sand about 2 inches or so deep.

Keep the cuttings damp for this next procedure.

Stick the cut end into Rooting Hormone.  Shake off the excess.

Set the Cutting end into the hole you just poked in
the damp sand. Press the sand down gently around
the new cutting, and proceed to the next Cutting.

Except for the last step, this is how your set-up
should look when finished. Note the Alcohol
you should use when making each cutting to prevent
any plant infections when making the cuttings.
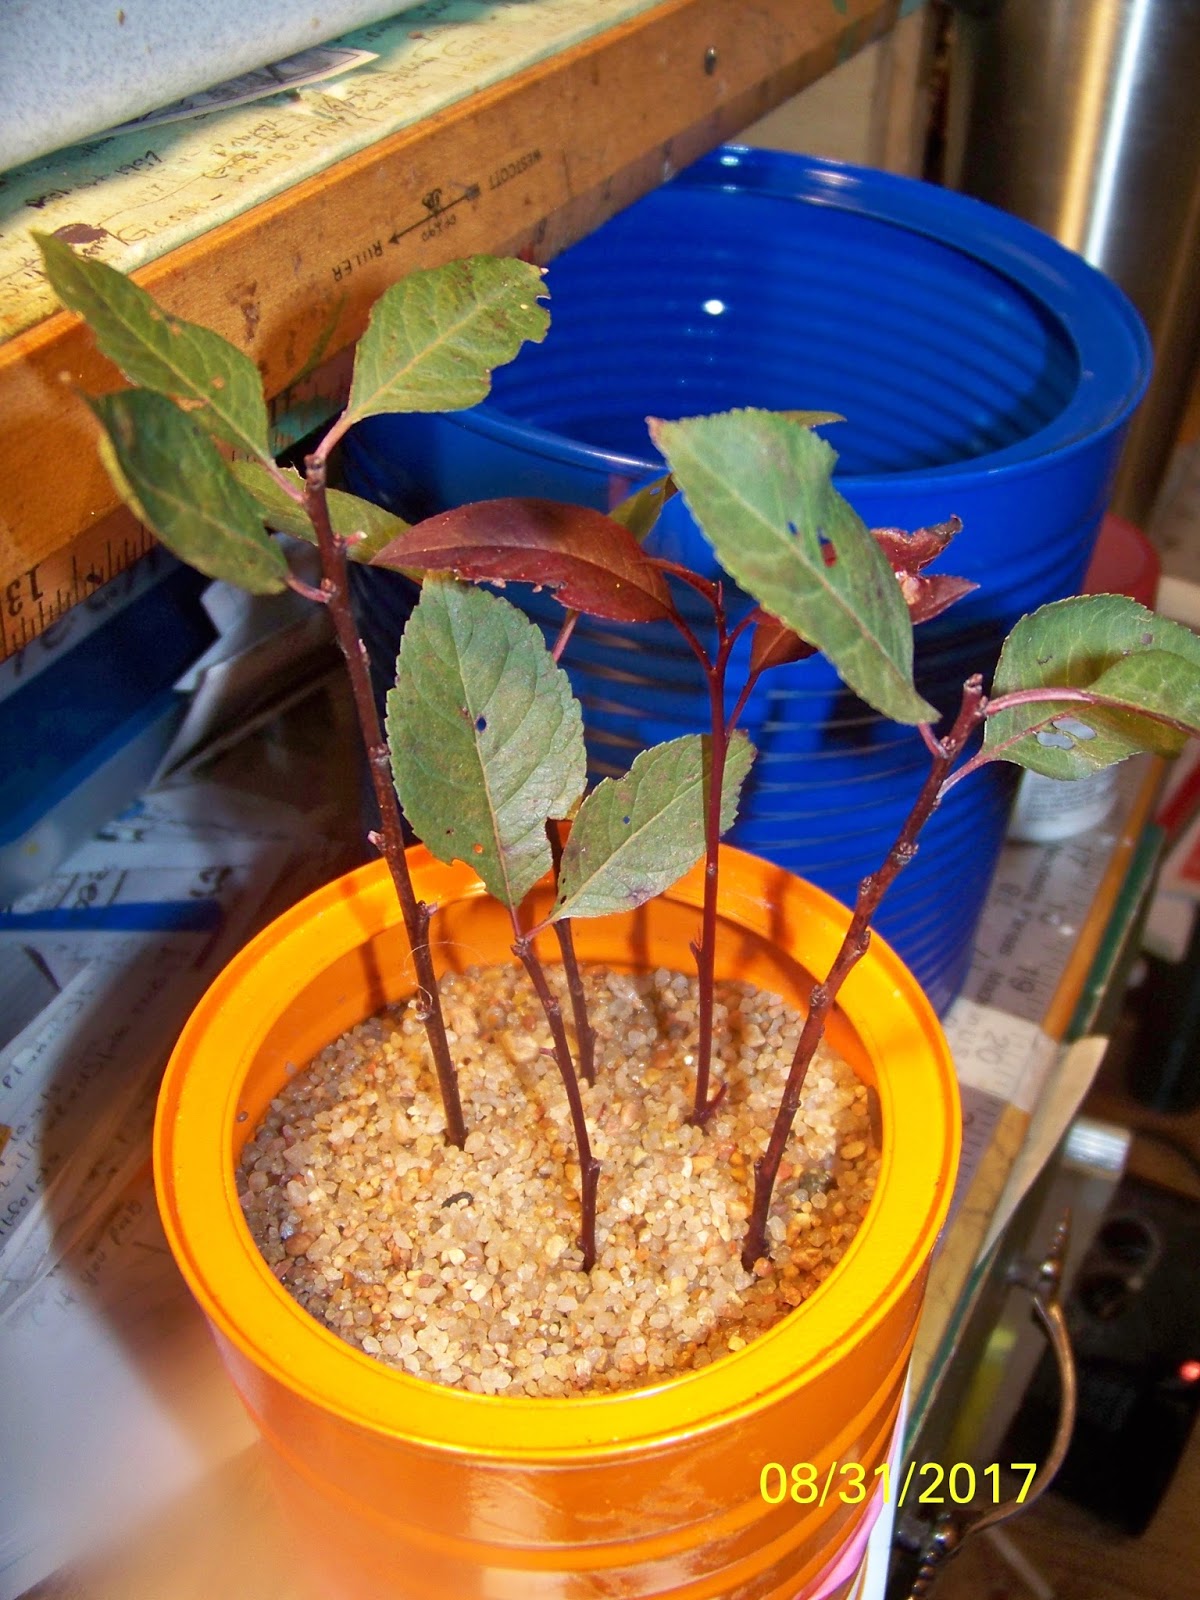

Your Sprouting can with the cuttings should look like this.
I place mine about 1/2 to an inch apart in the can.  About 1/2
the stems actually rooted with my first try.  I was happy.

For the last step, slip a Freezer Bag over the
Cuttings in the small can to prevent evaporation.
You should remove it whenever excess condensation
if formed.  The Bag should be prevented from touching
the leaves while the process is going on.  Hold the
Bag on the Can with a rubber Band.  The Cat is Optional.


              In about 2 weeks you should start to see roots forming.
                                   Allow another week and place the rooted stems in pots                   
                 to allow continue growing.  Water regularly.  Keep damp
                   and  in a  semi-shaded area .  The stems should soon start
                   putting on new leaves.  The cutting leaves will probably
                      drop off.  Put the new plants in a small pot to grow.  I start
                      mine in large 32 ounce plastic cups to get a good start.  Be
                            sure the pot drains well.  Introduce them to full sun gradually.
                            Later you will want to place them in a larger pot or plant them
                              out into your own garden or orchard. Try this on other plants!
                               Spring is a good time to take cuttings.  The stems should  springy
                 but not two new.  They should have plenty of leaf buds.


'


Tuesday, November 8, 2016

Monarch Butterfly Flowers. Saving the Monarch Butterfly from Extinction. Part 1

3 years ago I learned that the Monarch Butterfly of America was near to Extinction.  I learned that the Milkweed was Exclusively Important for it's survival.  It could get foods from other plants, but for some reason I had to have the Milkweed to Propogate.  To lay its Eggs on.  For its eggs to hatch, food for the Hatchling Caterpillars to eat (leaves) and strong stems to shelterself in a Krasillas (leaf Cacoon_ while it made its wonder metamorphos into the most Common and beautiful Butterfly in North America.  


A few weeks later, I was visiting the Flint Hills near Cassidy, Kansas admiring the rolling hills of Ranchland of green valleys, thousands of feeder cattle and Reservation for the Wild Horses from Arizona where they needed Rescue from their  ancient home that no longer wanted them. As I slowly drove down the Gravely trails and rutted roads,  I noticed a beautiful Flower that liked to grow along the side of the roads and such.  Full of Beautiful Monarchs gathering Nectar for food. I had to have a flower like that for GrandBobsGarden.  I clipped a few stems and brought  a few cuttings home that night to see If I could make them grow.  Not being prepared,  Not having the proper equipment,  unfortunately;  none survived.

  I was determined to get some of these flowers and finally found someone who had a few seeds for me to try.  As a result, they sprouted and I started to grow about 50 plants.  (What would I do with 50 plants!).  Well, I thought, there are people that love the Monarch Butterfly,  Maybe they would like to hear about the Flower that I found in the Flint Hills.  The one of nearly 150 species of Milkweed that had little or no Milk in its leaves or stems. It Could be seen for Miles with its Bright Orange Red Colors sprinkled over the vast prairie ranchland from Central Kansas and on East to the Missouri River where thousands of Angus and Hereford Cattle ranged and eventually ended up on Dining Tables from New York City to San Francisco and even exported to  far away countries. I showed a few pictures on the net and found many friends who wanted some of these flowers, not just because they looked Beautiful in their Flower Beds but because the wanted to Help the Monarch Butterfly to have food and a place to lay their eggs, and to reproduce and survive.  Their population was being Drastically Reduced by forest Fires in Mexico where the migrated to to overwinter to heavy spraying of Farmers and Ranches who seen them as pests in their fields and some variisdtys dangerous to their livestock - at least the varieties of Milkweed that had the Milky Latex in their leaves and stems.  later, I learned that most Cattle and Horses etc. don't even Like Milkweeds.  They eat them out of Hunger Desperation!  The Variety that I liked "Asclepius tuberosa" did not have this resin in its leaves or stems.  Commonly going by the name - Butterfly Milkweed. Please do not mix this up with the Common Milkweed, Swamp Milkweed, and over 100 other types growing in North America and other parts of the world.  The Monarch Butterfly Flower as I call it, has little or no toxin in its leaves or stem.  Although I still call Caution around grazing livestock and small children. My Cats and dogs don't touch it.  As I have heard the same results from other gardeners.
 I call it the Monarch Butterfly Flower,  since it is so popular to Flower Gardeners and Lovers of Butterflys!   Many of my readers, it seemed, wanted to try some too for their Butterfly Gardens.   I sold around 35 plants that first year.  This year I sold close to 300 First Year Plants, and saved back about a hundred as Second Year Plants for next spring.  I should have over 1000 Monarch Butterfly Plants next year along with a new crop of First Year Plants.  I will also be introducing other Milkweed species that are Native to North America and add much variety and color. All of which the Monarch Butterfly and other Butterflies use for food and propagation of their species.

This Blog post is the First in a Series of Blog Posts about the Monarch Butterfly Flower.   How to get Live plants from my Garden ,  How to Grow them.  Flower Pests and how to control them easy. And tips on starting a Butterfly Garden of your own!  Contact me on Facebook.  Robert Mader or on my Facebook Page.  "Home of the Kansas Monarch Butterfly Flower."  Thank you for your visit.  Comments are very welcome here and I try to personally answer everyone  as I get them. I am also available on Facebook "Chat" every day and evening mostly.

Monday, September 7, 2015

A Great Little Chicken Incubator You can Make = High Powered Fertilizer!

An Inexpensive Chicken Incubator You Can Build

This is another article from a few years back that didn't make it into my blog.  My daughter has made several incubators since and most have barely cost her Anything!  Chickens are fun to raise and you will almost always have fresh eggs with a few hens.  And as long as you have Chickens, you will always have great fertilizer for your garden or to add into your compost pile.  However, the manure from chickens is about 5X stronger in nitrogen than Cow Manure.  Start out by using at sparingly and see if your plants can handle it.  You can burn them up with Chicken Manure. 


This is my incubator.  Homemade from an old GOTT ice chest I found on the side of the road.  Believe it or not I BLEACHED this thing like crazy. 

I have cut out a window with a Dremel tool.  If you have never used a dremel tool, this is NOT the time to try it for the first time.  I think jig/sabre saw would have worked better.  I suggest making the window as big as possible if there might be more than on person watching. The first hatch I didn't get to see much except my children's heads crowded over it.

This is the window after adding the  "window" which is actually  a laminating material.  I will change it to glass or plexiglass before the next time.  The condensation was really bad if the room was cool.  I covered it with a towel and that helped.

The light/heat source that I used is a light fixture for a ceiling fan.  We bought it at a Wal-mart clearance for $1.00, and planned to someday use it.    It has room for four light bulbs.  I used two 7 watt blue bulbs and two 15 watt bulbs.  This way I did not have to worry so much if a bulb blew during the incubation.  The thermostat is a regular wafer.  I got it off of Craigslist/Freecycle for FREE.


I used a page out of Speckledhens book and used a shelf liner to cover the wire base.  What you can't see is that there is a 13x9 metal pan (it is actually an enameled pan) to hold water.  I also drilled some air holes.


The end result.


Update:  I used this incubator for about 3 years.  I just recently took it apart, and used the parts to make a hatcher out of an old wine refridgerator.  I am turning it into a hatcher.  I bought a used GQF Sportsman incubator with turner. 


Monday, September 1, 2014

Simple Composting and Compost Screening Tool to Make

Hello Folks!  It is the end of August 2014 and Fall is on its way already.  Due to an Auto Accident and a long recovery,  my garden started a little slow this year.  I didn't get that one 4 X 8 plot rejuvenated but I did manage to get in the major vegetables I wanted this year and done a little experiment with making and using compost plus trying out Manure Tea. In my last issue, I showed you how to make and plant a 3 X 6 Onion Bed.  Used for either early small Green Onion production or larger Late Summer Bulb Onions.

The  White and Red Onions are finished and while they are only medium sized, they are beautiful and tasty. The tops on the White Onion side were all down and drying.  The Red Onions were almost all down, so I pulled them all. They are drying out in the sun for a few days before bringing in for storage.  I planted about about 60 bulbs of each kind of Red and White and harvested at least 150.  I am happy with the results of the first season of using the new Onion Bed. 


Hopefully, by next year planting time, the Onion Bed Soil will be amalgamated and ready to plant by early spring.   The Red Onions were a little small, I felt.  I will look for a different brand next year.

 I also tried a Manure Tea mix of 1 part manure water to 6 parts water.  The Manure water was made with 2 pints of Commercial Composted Cow Manure and 2 pints of water stirred well and allowed to set for a few days in warm weather. From this, I made a strained Manure Tea.  (1 cup of strained Manure Water to 6 cups of out of the hose water) and out of this, I poured 1 cup of tea around each of  my vegetables.   


I used Manure Tea on All my vegetables to see how it worked out on the different types of vegetables.  I did notice some burning on All my plants which tended to set them back a couple weeks until they recovered and grew New Leaves.  None of the plants died, but there were a lot of yellow leaves on the bottom foot or two of my Tomato Plants. This mix was too strong!

The only other time I had Ever applied Manure Tea to my plants, was when years ago I made a mix of Rabbit Manure and Water and poured it around my front porch railing Coleus flower boxes.  I had heard that Rabbit Manure is so mild that it never burns plants.  Rabbit  Dooky!

   After about 2 days, they begin to shrivel before my eyes.  And they were just small plants from the grocery store anyway. Just getting established in their boxes.  I soaked them down several times with generous buckets of water, hoping I could stop the carnage!  In the end, I saved about half the plants ... and then they started to grow.  And Grow. And GROW!  The Coleus plant leaves got Humongous!  As big as dinner plates!

 People driving nearly a half a block away on a busy street were turning around, coming back and pulling up to the curb by our house.  "Where did you get such Giant Coleus?  Are these plants for Sale?    I just told them we had rabbits for sale ...


There was also some yellowing on my Zucchini Plants, my new bedded Onions, on my Cucumbers, and on my Dill.  I decided some modification of my Manure Tea Recipe was in order!  I then changed my recipe to 1 part Manure Water to 10 parts Water and made another application 2 weeks later.  This time no burning.  All the plants are Thriving like crazy now except for the Onions whose harvest time has come.

Through out this experiment, I applied 1 cup of Manure Tea to each plant in the main root area.  I also tried to stay about  2 inches away from the main stem. A few day later,  all the plants started a nice growing spurt which I attribute to the newer milder Manure Tea Mix.  My plan was to apply Manure Tea every few weeks or so. 

In another experiment this summer, I wanted to see what adding a 1 inch layer of new Sifted Compost around each plant. to help keep the moisture in and how it works as a purely natural Fertilizer.  In addition, I added an inch of wheat straw on top of the whole thing to help Shade the roots of each plant.  My Cucumbers are putting on fruit fast this year, full of flowers  and have the large sturdy stems and leaves. 


Simple Easy Composting
Composting is probably the easiest thing in the world - if you are willing to wait 6 to 8 months for the results. Nature takes a while but you always get good results in the end. Even if you do nothing!

An easy way to make compost, is to watch for leaves that never got raked along fence lines... Take a fork. Pull away last years leaves on top and down below this you will find finished compost.  Just fork it into a container and take it home.  However leaves, even dry ones, are not compost.  Put them directly on your plants, and the next good rain will paste them together an make a barrier that keeps your plant from getting moisture and air.  And while the leaves underneath are composting, they are Stealing Nitrogen from the plant to do the process.  The plant actually suffers from the process!


Compost in 3 weeks!
It's true, vegetable matter, egg shells, banana peels etc add good nutrients to a compost pile - but don't do a lot to speed up the process.  Instead of taking Months to make compost - how about 3 or 4 weeks using equal amounts of just two free items.  Grass Clippings from this week and Dried leaves from last year.  No special Ben is necessary.  just make a pile Alternating equal amounts of Grass and Dry Leaves.  No additives - unless you want to. Try to make the pile about 3 foot around and 2 or 3 feet tall. Dampen down with water.


Easy Compost Recipe

           One Part of Old Dry Leaves
           One Part  of Fresh Lawn Clippings.
           Or 1 Fork Full of Grass Clippings for ever Fork of Dry 
            Leaves. 
            80 degree days or better for a few weeks to Heat the pile and get it started Composting.   Pray for Rain. Or sprinkle and mix the pile is damp through out.  Not soggy or dropping.

Take a hand full of the leaf/grass mixture and squeeze. It Should not drip, but should feel like a damp sponge rung out.
If it is too Dry,  add a little water and mix.
If it is too Wet, add equal parts Leaves and Grass Clippings until you get that damp rung out sponge texture.

Try to turn with a Garden Fork every 3 or 4 days.  The mixture of leaves will start to look "Crumbly" in about 2 weeks.  In about a month, 90% will be broken down and ready to spread over your garden soil - or sift and pore into your Container Plants or Plant Boxes.


This is about 90% composted.  At any time, you can reach into the bottom of the pile and pull out some much needed compost. 
The good stuff is usually near the bottom of the pile that is still working.  It takes a few weeks and  a few turnings to be able to find this stuff in a New Compost Pile. And I'm impatient.


Rolly-Polly Bugs

 You may see a few small gray Accordion Looking Bugs crawling about and through the fresh compost. Anywhere from 1/4 to 1/2 inch (1 Centimeter) long. About as thick as a skinny Soda Straw.

Rolly Pollys won't bite you. Let them alone.  They actually help the composting process a lot and work at it very hard.  They will not usually hurt the plants.  They like to chew up Dead Organic Matter for their sustenance.  If the baby bugs are extremely hungry, they may attack your plant roots - but this is rare. I have Never seen it happen however.  I'm not sure what they are Officially called.

When I was a kid, we called them "Rolly Pollys" and watched them crawl around in the palm of our hands.  And they seem to be everywhere there is dead matter to be broken down into healthy soil.  Under Brush, damp rotten Boards, and in every Compost Pile.  They are Beneficial Bugs and help you make great compost.


This is freshly screened compost.  I have circled in green a Rolly-Polly.  You should be viewing it at actual size.

Another bug you will see often are Millipedes  (translated means 'many legs'.  Kinda resemble gray or black skinny hairless caterpillars with lots of legs and can move very fast.  DO NOT CONFUSE with Centipedes  ( ten legs?) usually Bright Red, Orange or Yellow in Color.  Millipedes are also usually found in Compost. Centipedes more rarely.  Centipedes Are Dangerous, like to bite and come with a mean streak and are poisonous.  Don't touch them!

While I am at it.  Often you will see Wolf Spiders in Gardens.  They are looking for Bugs to eat and are (to my knowledge) not dangerous to people.  I have had many run over my arms picking vegetables and have never been bitten.  They are medium size, rather plump looking, and are called Wolf Spiders because they are Gray and have what looks like a woolly coat of grey fur on most of their body.  I leave them alone.  And they are Beneficial to your Garden.  Likewise, colorful little garden snakes.  But learn which ones they are!  Even Moles are benificial in that they are busy turning the soil.  Voles  however (a relative of Moles) not only turn the soil,  they eat the tender roots of your plants.  Moles just look for Grubs.  If you have them, worry about the Voles most.  Learn the difference.


If you have never used Composting or using the great Rich Soil it produces, you need to give it a try.  I have applied a cover of about one inch or more around all my plants.  Tomatoes, Onions, Cucumbers, Dills, Asparagus.  And even around a Volunteer Watermelon Plant - that originally came up in my Compost Pile .  It's doing great, except for the one small melon that our Dachshund managed to eat when she found a break in the fence. Others are coming along nicely too.  All in all, there were 3 volunteer watermelon plants  and one Roma (?) tomato plant growing in the compost pile this spring.  I couldn't kill them.  So I transplanted them to a better spot! The screened compost around this Cucumber plant not only helps hold the ground temperature down,  It also helps hold the moister in down below and becomes the perfect fertilizer when the plant is watered.  However, to really keep the hot sun from drying out the box, I will be adding Wheat Straw on top of this in a day or two.  It does not Mat Down as just leaves or dried grass would.  Wheat Straw Reflects the Sun off of the soil and provides a kind of Air Conditioning for the plants roots!

Because of their great qualities and inexpensiveness, both of these (Compost and Straw) are great additives to protect your plants in the heat of the summer.  If you see lots of Crickets, it means that the Straw is doing its job and they are comfortable in it. And,  you have a great supply of good Catfish bait handy! 

[  To make the Handy Sifter shown in this article, Check out my article : http://grandbobsgarden.blogspot.com/2010/05/make-this-handy-dandy-compost-sifter.html  ]


  Making a Scraping Tool for your Compost Screen

If your compost is a little damp,  as it should be; You need to help push it through your screen for easier and faster results.
I was just using my hand but if your Compost has sharp sticks in it or even bits of glass, you need a better way.  


I looked around for a tool - maybe a stick to see if it would work better.  I found an old board in the trashcan I have situated in the corner of my garden.


[By the way - to interrupt my narrative - you have probably noticed the January 1, 2008 on some of these pictures.  No. these pictures are not 6 and 1/2 years old!  When you reload batteries in My camera - it resets the date back to it's original factory time.  You have to notice and reset it to the correct date.  I didn't notice this time.

  That's what happens when your the Gardener, the Writer, the Photographer,  Editor,  and publisher of a garden blog! Little things tend to slip in unawares!  These pictures are all within a day or two of September 1, 2014.  Rather than take additional time to edit the wrong date out, I ask for your understanding.]


I found out that with the help of this old board, I could easily and quickly rub the damp compost through the screen and soon have some fine compost to spread around my plants.  Each Garden Fork Full gave me around a Gallon of fine Screened Compost.  At this point of screening, you can pick out any bits of trash, sticks, small branches, plastic, glass, rocks and other junk that may have ended up in the Compost pile.  Extra large pieces of Compost?  Just throw back on the Composting Pile to further break down for later screening.  


This is what is left after sifting my compost.  Extra large Chunks of Compost etc.  In the red area we find an old plant pot label.  In the Green oval, a small rock.  lots of small plant sticks etc.. Pick out the trash and throw it away, then recycle the rest back to the compost pile to continue working.  Nothing good is thrown away!


Using a practiced eye, I noticed how the configuration of my hand and the old board fit together as I worked.  What felt best. I come up with this.  how I could cut it out so my hand and thumb would fit comfortably.  An Ergonomic tool custom made for easy holding!  I will show you how to make this easily in an hour just using simple tools and a little stain varnish to help protect it from the weather for a few years. 


This is the set-up I use to sift out my compost.  To the upper right is the trash can to throw out any junk that may be left in the sifter after screening.  The Wheelbarrow with the beautiful Purslane plant that made itself at home, provides the height i need.  The Blue tub catches the sifted compost and the Sifter of course is self-explanatory.
 This sifter is Several Years old with a few simple repairs and you can find out how to build one for yourself.  Search through the articles for Compost Sifter plans.  I should be listed as one of the Favorite Articles on the narrow column to the left of the main article here. 
  You will never be without this light and hand tool again!  Let the "young'uns" play with those big awkward things used for sifting Construction Sand!  This hand "Soil Sifter" is my own invention and you may use my instructions for making one or two.  Please be my guest. 

After you have built this little hand gadget, you are really ready to start saving great sifted compost.  Use it for everything from Raised Garden Beds to the Pots and Containers of Flowers and Vegetables around the house.  Even bushes and trees can greatly benefit from its water retention qualities and its great Fertilizer Power when watered into your top soil.  It also helps to "fluff up" your soil and keep it airy and loose the way that plants love the soil to be and thrive on it.


I have found that with the second finger in the center, and the thumb and little fingers on the sides, you can get some great leverage and push a lot of compost through in just a few minutes. 


As you will see in the single page plan below, there is a bevel  on the business end of the tool.  The angle is not too critical. Somewhere between 30 and 45 degrees works well. 

 Cut it with your saw or just use a Wood File or Sander to get the angle.  The Bevel greatly facilitates the ease of using the tool and really helps to quickly move the broken flakes of compost through the screen.  You will have a couple gallons of fine quality sifted compost in just a few minutes.  If I was selling it, I would say it is worth 3 to 5 dollars a gallon to fine Flower Growers.  That's how good the quality of this stuff is when you make it yourself.  And the Material is Free! 


To finish it out to keep it from deteriorating outside in the garden, give it a light stain for looks and protection. Spread it with a varnish of any kind.  I like any popular spray can version.  It will last for years.  It probably costs you about 3 cents worth of new lumber. 

Compost Screening Tool

I Drafted a simple picture to follow so you can make your own.  I used a chunk of White Cedar Fence Board about 3/4 thick.  You can cut it out with a power saw (Jig Saw or Band Saw) or just use a hand held Coping Saw to make yours.  Hardware Stores always have them.  They cost around $10 dollars plus a package of blades. 

After cutting the tool out, I rasped it with a wood rasp to round the edges and smooth the curves.  Sand a little and spray with a can of paint or Clear Lacquer.  Your done.  Less than an hours work. 


Happy Composting Garden Friends! 

 Contact me at RobertLee97@gmail.com.
Please leave a comment if you made your own Wooden Scraper for screening Compost or if you just enjoy the article. 
  

Sunday, June 22, 2014

Square Box Gardening #14 - Raised Bed Onion Soil Mix


     Here is the Soil Mix I used in my Raised Bed Onion Box.


I am not guaranteeing that it is Perfect and you will raise the finest onions in the world.  There are just too many variables - and you may want to make changes. You may decide to use a Commercial (Chemical?) Fertilizer for example instead of the Composted Cow Manure I have been buying and using for the last few years. I get this in a bag at True Value so I guess It's Commercial too!

Or, you might substitute Horse Manure - or add Epson Salts (Magnesium Sulfate) to the soil. Tomatoes, Peppers and Onions love it and Need it and its usually found in good soil. You may want to use your own Garden Compost in place of the Cotton  Boll that I use in my soil mix. I really like Bocca Brand Top Soil that I get from Dutches Green House.  I feel like it is of good composition and I won't get a bag of half clay.
I got about 15 bags of really cheap stuff when I first started serious gardening from a Prominent  Big Box Store that shall go unnamed. The next year  I scraped up this "dirt" and used it to fill holes and truck ruts in the back alley. The Trash man was forever grateful...  But I digress... 

                           "My Onion Soil Mix Recipe"

2 Parts Construction Sand  (Course Sand, not fine Children's Sand)
10 Parts "Bocca" brand Top Soil (At Most Plant Nurseries
5 Parts Cotton Boll   (Most Plant Nurseries)
3 Parts Composted Cow Manure   (True Value Hardware)

How to Mix:  Always go around the outside in a circle around your unmixed pile. Shovel into the Center of the pile and turn the shovel over. Keep this up going in a circle around the pile. Use this method wether you are mixing soil, cement or bread dough.  It works best.

Always go in a Clock-Wise direction.  If you go Counter-Clockwise, you will just Unmix the Mix your Mixing.  Pretty soon you have nothing but a wispy Molecular Vapor going out into space. And you will just have to go out and buy more stuff. [Just a little joke folks.]

                                            APPENDUM                

                                        Just 30 Days Later

It's been almost exactly 30 days - a Month - since I set up the Raised Bed Onion Box and planted about 150 bulbs in it.  This is how it looked today.  I  added about an inch of screened garden compost to the top just about 3 days ago to not only give the onions nourishment, but to help keep the soil moist as we move into summer.  I will begin a regular regime of adding a diluted mix of Manure Tea about every 2 weeks as well as digging in a little bone meal and Manganese Sulfate - Epson Salts.  This will continue until the tops start falling over and the watering and fertilizer will be cut back to prepare the onions for harvesting. 

So there you are.  If you wish to contact me you may do so at
RobertLee97@Gmail.com.  

                     May you have a Great Garden this Year!  

GrandBob
PS:
If you would like to make a comment,  I would love to hear from you about gardening. Unfortunately, the comment section doesn't seem to be working well and people have to jump through hoops to make a comment.  I can't seem to fix it so I will probably remove it in the near future. Just send an e-mail to the address above.  The Wicked Witch of the West (who lives in Western Kansas),  will be monitoring all comments before publication.

Note:   The largest Onion bulb I got out of the Batch was 3 inches in diameter.  The average was about 2 - 1/2 inches. I harvested over 130 usable onions in the 3X3 Foot Square plot. The soil mix test turned out very successful I believe. 

Saturday, June 21, 2014

Square Box Gardening #13 - How to Plant Big Bulb Onions in My Raised Bed Onion Box

Have you built the Raised Onion Bed that I give instruction for a few days ago?  Well, even if you haven't, this information will help you to get those Big Onions like you buy in the Grocery Store.  The only difference is they haven't aged in a warehouse for several weeks! You know exactly how they were Processed, Where they come from and how Fresh they are.  And using a raised bed in a box, you know exactly how much water you used, what kind of fertilizer, and what soil mix you used to get the best production.  To help you repeat the successes you had next year - or correct your failures!  The best part of Learning to Garden.  
 If you just found my blog, check the Article List in the right column to find the article that  immediately proceeds this one. "Growing Large Onions in a Raised Bed Onion Bed".

           Preparing the Raised Bed Onion Box for Planting

Find a level spot for your box if you can.  As you can see, the Onion Box I built is Not setting on a very level area.  The Right side is about 2 inches higher than the left!  I can dig down on the Right side (and both ends somewhat) to set the box down level with the Left side.  Or I could level the box, set it on some small blocks and shovel  a small truck load of Fill dirt on the Left side.  Or I could build a "Skirt" around the box that will keep the box level and save a ton of extra work.  At my age, I am Not into tons!  I am more into 2  or 3 gallons or even 2 or 3 cups!  It's the very reason I got interested in Square Box Gardening.  So I would still be able to garden after the lumbago and arthritis set in. Thankfully, I haven't suffered much from either one so far. I digress....  Anyway, I chose the "Skirting" method.  Which we will get to in a few minutes.


 Because of the semi-hurricane force winds we've been getting lately here in South Central Kansas, I layed it down and quickly threw a few chunks of soil on the plastic to keep the box from doing the kart-wheel, kite thing.  You probably know,  if you built one of these Onion Boxes,  as large as they are;  they are surprisingly light and can easily be toted to the garden under one arm.  Myself, I tracked down my dear wife playing free-cell on her laptop where it was air conditioned and comfy while I sweated and swatted  in the noon-day sun!   I figure two arm carriers  are better than one.  

                                      Leveling Out the Box

     The best tool for leveling is a large construction site level - but any level at hand will work.  You can even make your own.  Take a 2-liter bottle with a cap. You put water in it about half full. close the cap.  Lay the bottle on its side on a flat surface that is level.  With a marker, mark where the water comes to the center of the cap and another mark where the water comes to the center of the bottom.  Lay the bottle with it's marks on something you want to check for lever. Rotate the bottle until one of the marks meets the water line. Lift or lower the other end of the bottle until the opposite mark Also meets the water line.  When both points match up with each other, you have a Level  and your bottle is teetering right over the center of the earth!   Check your box with it. 
Save the water filled bottle. The next time your wash machine starts walking across the floor or your drier tries to fly, use your bottle to check for level.  In All directions - side to side; front to back.  Do likewise with your onion box.  This is probably one of the most important steps you will take in setting up your box correctly.  If your box is not fairly level, you may see a lot of soil and plants go over the side with the next big gully-washer you have.  You might even put a few marks around the box marking one inch up from the soil after it is firmed in.  Fill water in the box to this level and you have just added an equivalent of an inch of rain to your onions. In reality, if you have good draining soil, a half-inch mark might be more accurate when you are watering.  Experiment. 

Sometimes, your ground is just slopping to much like mine was in this picture.  In that case, you will need to have extra boards ready to "Skirt" the bottom of the box and make up the difference.  I draw a line all around the box that is 3 inches from the top.  Fit your boards to meet this line and screw them to the Onion Box.  Dig down along the sides until the boards set solid and the tops are level with the Onion Box.

If you have to skirt the box, place stakes around the sides of the     box to keep the pressure from the soil from bulging out the bottom.
I used 1 X 2 stakes.  Snugged them flush to the skirt sides and pounded them in deep.  


Here is a close-up showing how the corners were reinforced.  Use as many stakes as you need.

Add about a quarter of the soil mix at a time.  with the palm of your hand, gently firm the soil all around the box. A little more  firmer at the very edges of the box.  Just as you would a flower   pot.  Add more layers and firm the same until you are about 1-1/2 inches from the top of the box.     You need to leave about that
 much for when you need to add water.  Check your soil fairly often.  Your onion soil should be damp just below the surface at all times.  Never let the onions dry out.                                                  


I use a board marked off in 4 inch increments at a guide.  I also mark the top of the box along the length every 4 inches.  This gives me nice and uniform points to make holes for the Onion bulbs.  The holes should not be very deep.  About an inch. The tops should just barely poke through the soil.  This would be the pointy end up. The blunt end down.  As shown in the picture below.                               

                         
The dirt encrusted Fore finger and Thumb nail  are extra. The bulbs should be plump and firm.  Throw any tiny bulbs or dried out husks away.  They will not sprout and would be a waste of space.

  
Your Onion Bed should look something like this when you are finished.  cover just a little and firm down with the palm of your hand.  I have heard that some onions are actually just dropped in an
open furrow and they plant themselves.  I really don't know about that.  About a week or two later your onion bed should look like this.  I water mine every day enough to keep the top moist.  If it looks like rain - I water it anyway.                                                          


I hope you enjoyed the articles about building an Onion Box and how to plant your onions.  This is a another article in the "Square box Series - although the box isn't square, the principals are the same.  If you get tired of planting onions in this box, you can plant spinach, or carrots, or just about anything will grow and grow well in these boxes.                                                                                 

Until next time, Happy Growing!
GrandBob
Robert Mader